


For the Windows Resource Page, click here.
For Mac Projector help, click here.
- Contents included in each laptop bag:
- 13″ MacBook Pro Laptop (with battery)
- AC Adaptor/Power Cord
- USB Optical Wheel Mouse
- Mini Display Port to VGA Adaptor
- Instruction Sheet
- Sheets included in each laptop bag:
- Laptop Instructions 2011 (Word docx)
- Laptop Agreement (Word doc)
Wireless Internet Troubleshooting
- Make sure you are connected to a wireless network. To do this, look at the top right hand corner of your screen. If the bars are filled in black, as seen on the example picture where the red arrow is pointing, you are connected to the internet.

If the bars do not appear filled in, you are not connected to the internet (the number of bars highlighted indicate signal strength. If at least one is filled in, you have internet access). If no bars appear, as seen in the example picture below, you must connect to the internet.

- To connect to the internet, click on the icon that looks like a section of a pie graph (in the example picture above with a red arrow pointing to it). Once you click on it, three choices will appear, however only two are available to click on. You want to click on the “Turn AirPort On” option.
- After you select “Turn AirPort On” a box will appear on your screen that contains a list of available networks. It will appear similar to the picture below (NOTE: you may have a variety of networks available based on your location. HOWEVER, if you are on campus, the “gc” network should always appear).
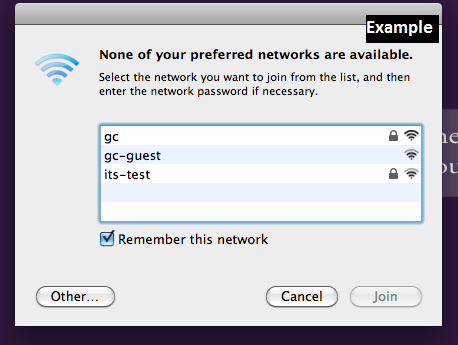
Once you have this list of available networks, you want to select the “gc” network. When it is selected, the dialogue box will automatically expand and appear like the example picture below.
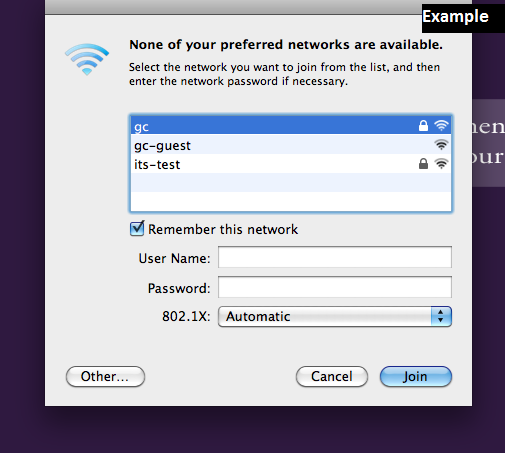
- Once the dialogue box expands, you will need to enter your GC username and password in the User Name: and Password” spaces. Once you do this, click “Join” and it will check your username and password and authenticate you for internet use.Once you have completed this process, you should be able to use the internet. To make sure you are connected, the icon in the top right hand corner of your screen (that you clicked on to start this process) should appear as seen in the picture below (the red arrow is pointing to the icon to show how it should appear but the red arrow will not be on your screen).
Connecting a Laptop to a Projector (Mac)
For Windows projector help, click here.
*Note – Because of the variation among laptops and projectors, these instructions are only meant for equipment that has been checked out from ITSMedia.
- Make sure the projector power cord is plugged in securely, the power button on top is green, and the lens cap is off.
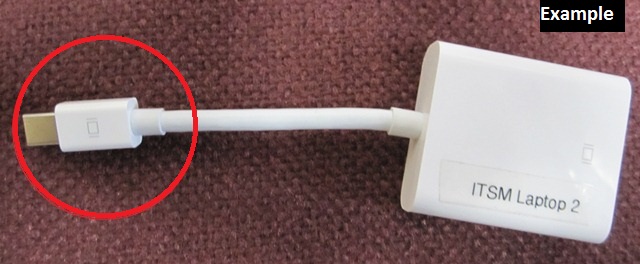
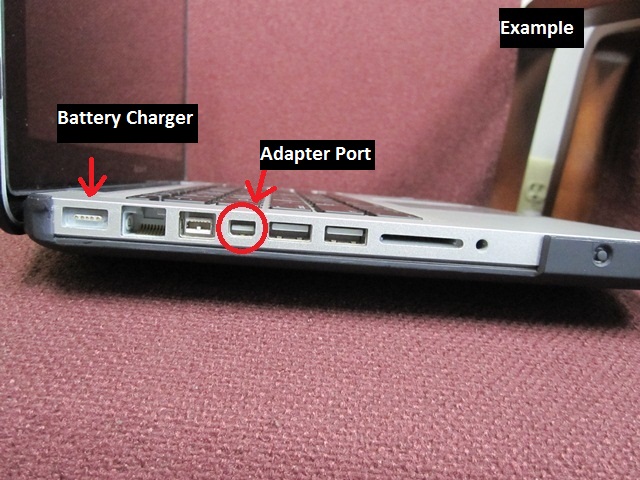
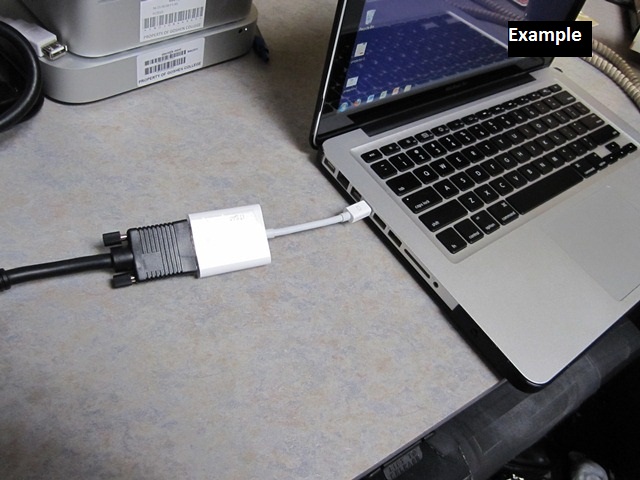
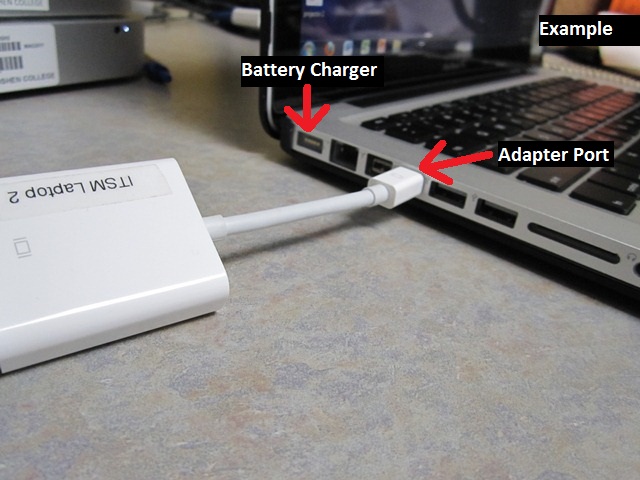
- Next, check that the RGB cable is connecting the laptop to the projector. To connect the RGB cable to the laptop, you will need the adapter found in your checkout laptop bag. The small end of the adapter connects to the laptop on the left hand side of the computer. See the following pictures for visuals of these items.
The RGB cable then plugs into the end of this adapter and in the projector in either ‘RGB 1 IN’ or ‘RGB 2 IN’.
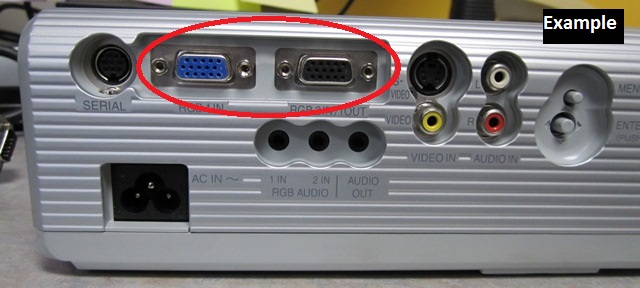
- Check the input on the projector. If the RGB cable is connected to ‘RGB 1 IN’ then the projector input should be on RGB 1. If it is connected to ‘RGB 2 IN’, then the input should match. You can check the input but using the remote or on the projector itself. On either one, there is an “input” button and this will show you what display you are using. If you press this button multiple times, it will scroll through the different displays.
- Check the output on the laptop. The laptop *should mirror the display automatically. If you have tried these and the projector still does not display your computer screen, double check the projector is powered on and that all cables are securely connected, as mentioned previously. Then, to manually change your computers display settings, follow the instructions below.
- Click on the small icon on the top right hand corner of the screen that looks like a small TV, as seen in the image below. **If you do not see the small TV icon, skip down to step number 8.**

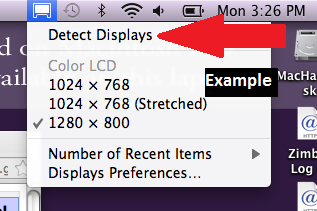
- A drop down menu will appear. Click on the “Detect Displays” as seen in the image below. This should detect that you are connected to a projector and display your screen through the projector.
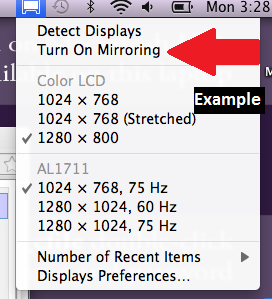
- Look at the screen being displayed on the projector. If it is not a duplicate of your computer screen, it will not display your presentation. You will need to mirror the desktop. This will duplicate your computer screen onto the projector screen. To do this, click on the small TV icon again and select “Turn On Mirroring” as seen in the picture below. This will duplicate your screen onto the projector screen.
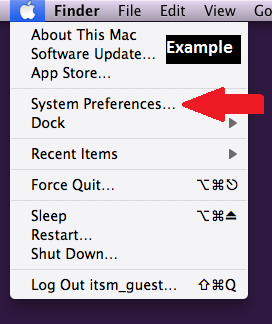
- If the small TV icon does not appear, you will need to go through system preferences to change the display. To do this, click on the apple icon on the top left hand corner of your screen, as seen in the picture below.,br />

- A drop down menu will appear. You should select “System Preferences” as in the picture below.
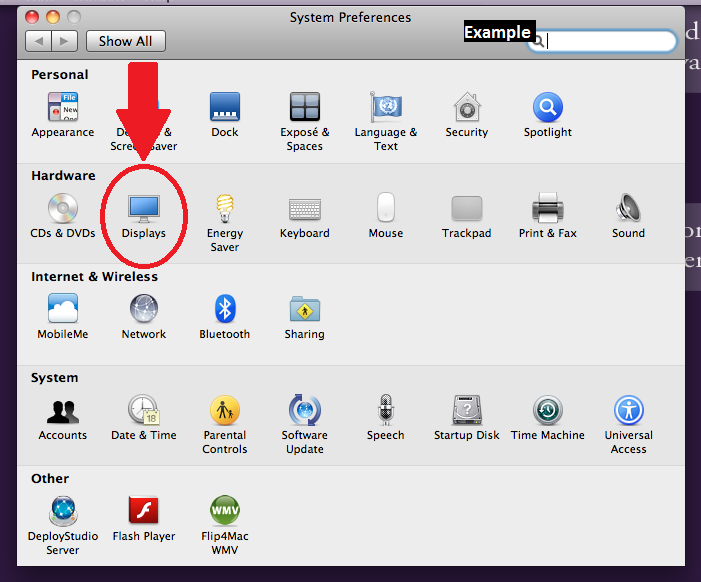
- A dialogue box will appear on your screen that has many options on it. You will want to select the “Display” option. It is located on the second row of choices, with a TV as the icon. If you are having difficulties finding this option, see the picture below.
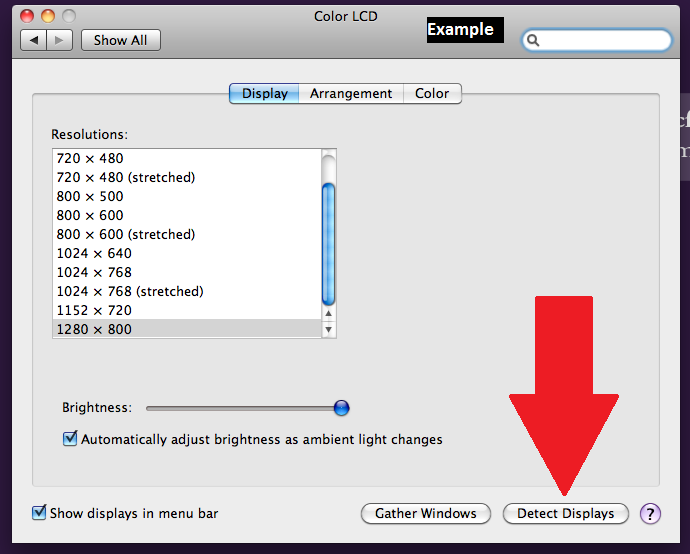
- A new dialogue box will appear. On this box, you will want to click on the “Detect Display” option. It is a button located on the bottom right hand side of that dialogue box, as seen in the picture below.
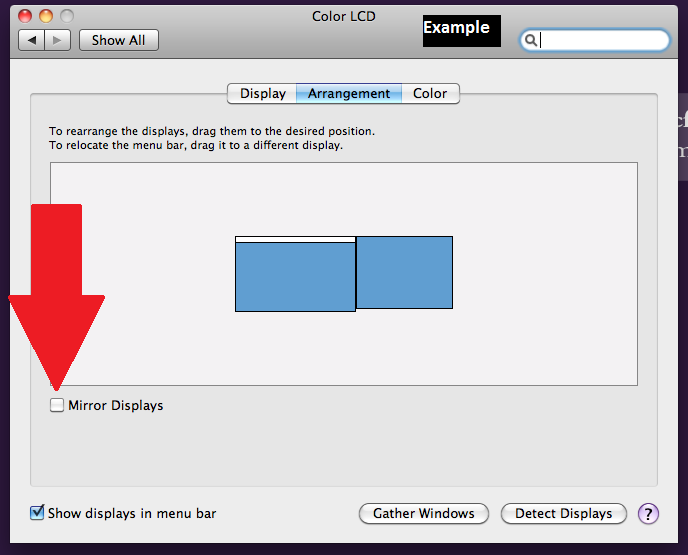
- Once you have done this, the projector should be projecting onto the screen. However, if the screen being projected is not a duplicate of your desktop, you will need to complete one last step. From the same dialogue box seen immediately above, click on the “Arrangement” tab on the upper middle section of the dialogue box. Here, it will give you some display options. To duplicate your desktop screen onto the projector, you will want to make sure “Mirror Displays” option is checked. The location of this option is seen in the picture below: NOTE: in this photo, the box is not checked. You will want to make sure it is checked. This will then duplicate your screen onto the projector.
- Once you are finished, you can close the dialogue box and begin your presentation.
*Hint: If you connect the RGB cable and turn on the projector before turning on the laptop, when the laptop is turned on it will change outputs automatically.*